The Azure Lab Diaries - Sentinel For MSSP & Protecting Intellectual Property

Hello You#
It’s been a long time since I wrote a blog post, recently I read about how to protect intellectual property for MSSP on Microsoft Sentinel, and it was a neat idea. I thought it would be a great idea to write on how to do it step by step…
Before we discuss intellectual property protection, let’s start with the process of onboarding a customer’s Microsoft Sentinel environment into your MSSP Azure tenant. This foundational step enables you to protect and manage your intellectual property, including:
- Analytics Rules
- Workbooks
Preparing Customer Environment#
Creating Microsoft Sentinel for the customer
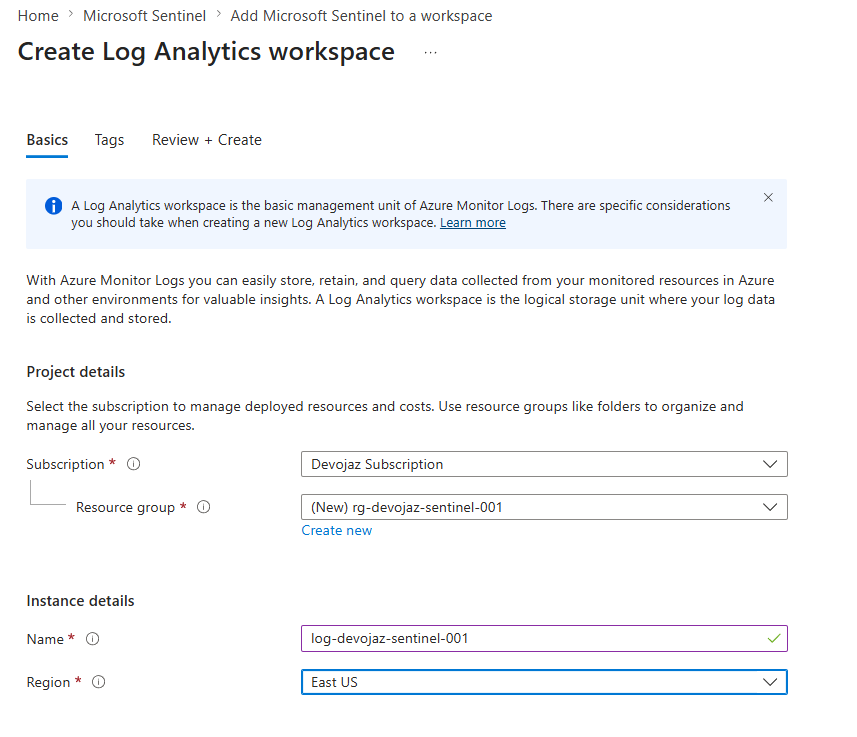
Once we create the Log Analytics Workspace and Microsoft Sentinel, we need to install content from the Content Hub and enable it from Data Connector to start ingesting logs, something like Microsoft Entra ID to get the AADNonInteractiveSigninLogs, as we’ll need it later. Then, we are good to go.
Azure Lighthouse#
Azure lighthouse is a resource delegation management technology that is available at no additional charges.
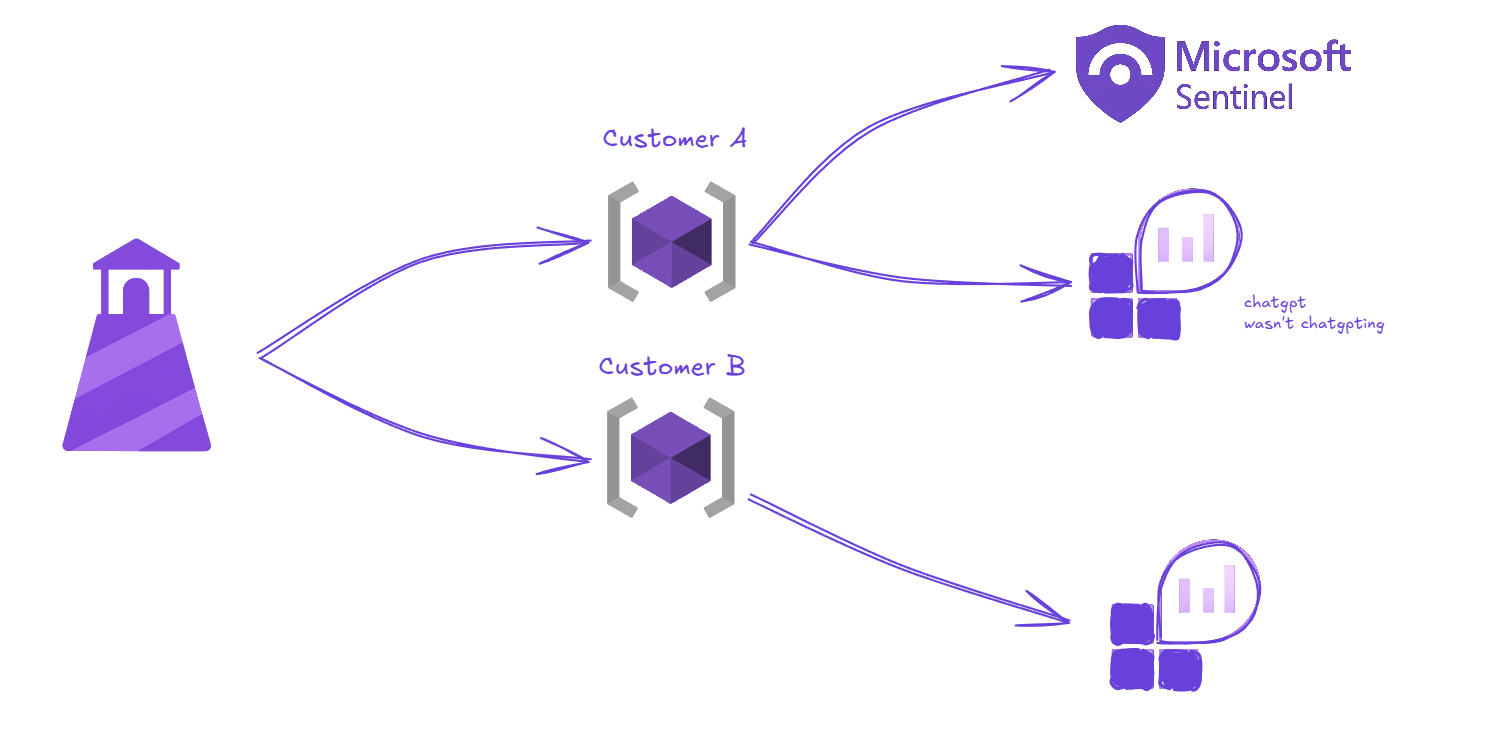
We use Azure Lighthouse for cross-tenant management, a single pane of glass to manage your partners resources from your own azure portal, without having to switch directories using B2B to access customers resources.
Additionally, access is delegated through Azure RBAC roles, either by assigning roles individually, each user with their needed roles (which isn’t the best way in a large environment) or by assigning roles to a Security Groups.
Thank god that there’s still some free stuff…
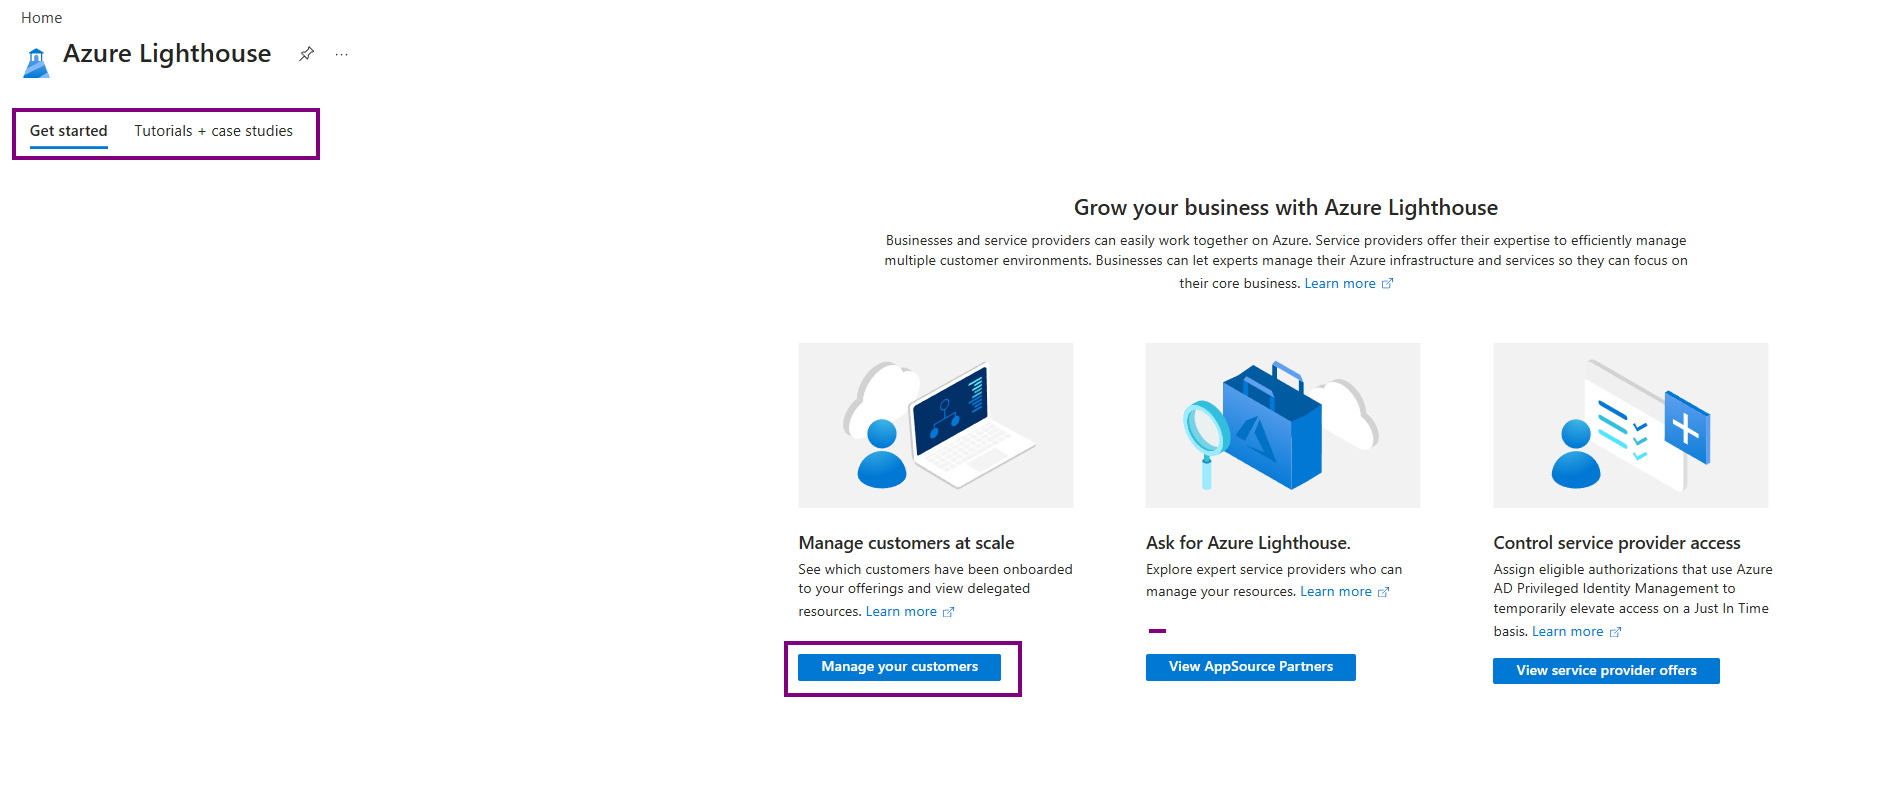
To start with Azure Lighthouse go to Azure Portal > Look for Azure Lighthouse
You’ll find tutorials and case studies there but you won’t need them after reading this blog ;)
Once we go through the Manage your customers the Azure lighthouse will give us more options and show us the following:
- Activity log
- Customers
- Delegations
- Cloud Solution Provider (CSP)
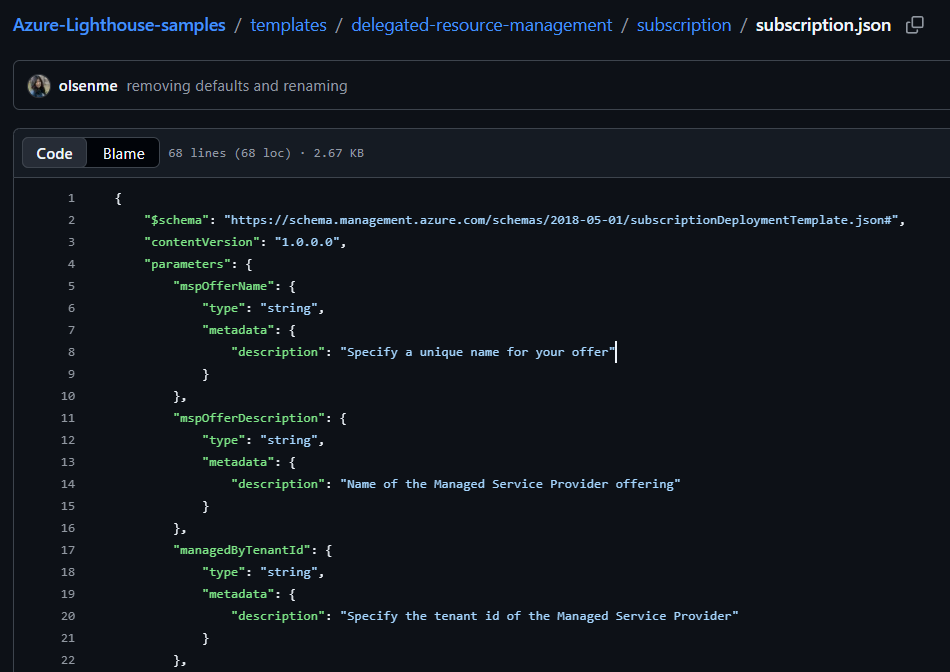
However, in the overview we need to create an ARM template to send it to our customer or if we have access to their environment we can login and use that ARM template to onboard the customer resources.
Read this for more details on the ARM template structure for onboarding customers, it shows multiple templates types:
- Full Subscription template
- Resource Group template
- Cross Subscription Template
 And many more.
What is an ARM template??? So basically it’s a JSON file that defines infrastructure & configuration for your Microsoft Azure Projects and it’s used as Infrastructure as Code (IaC) to deploy cloud resources repeatably without configuring them manually every time… oh and it stands for Azure Resource Manager :0
Let’s continue with creating the ARM template:
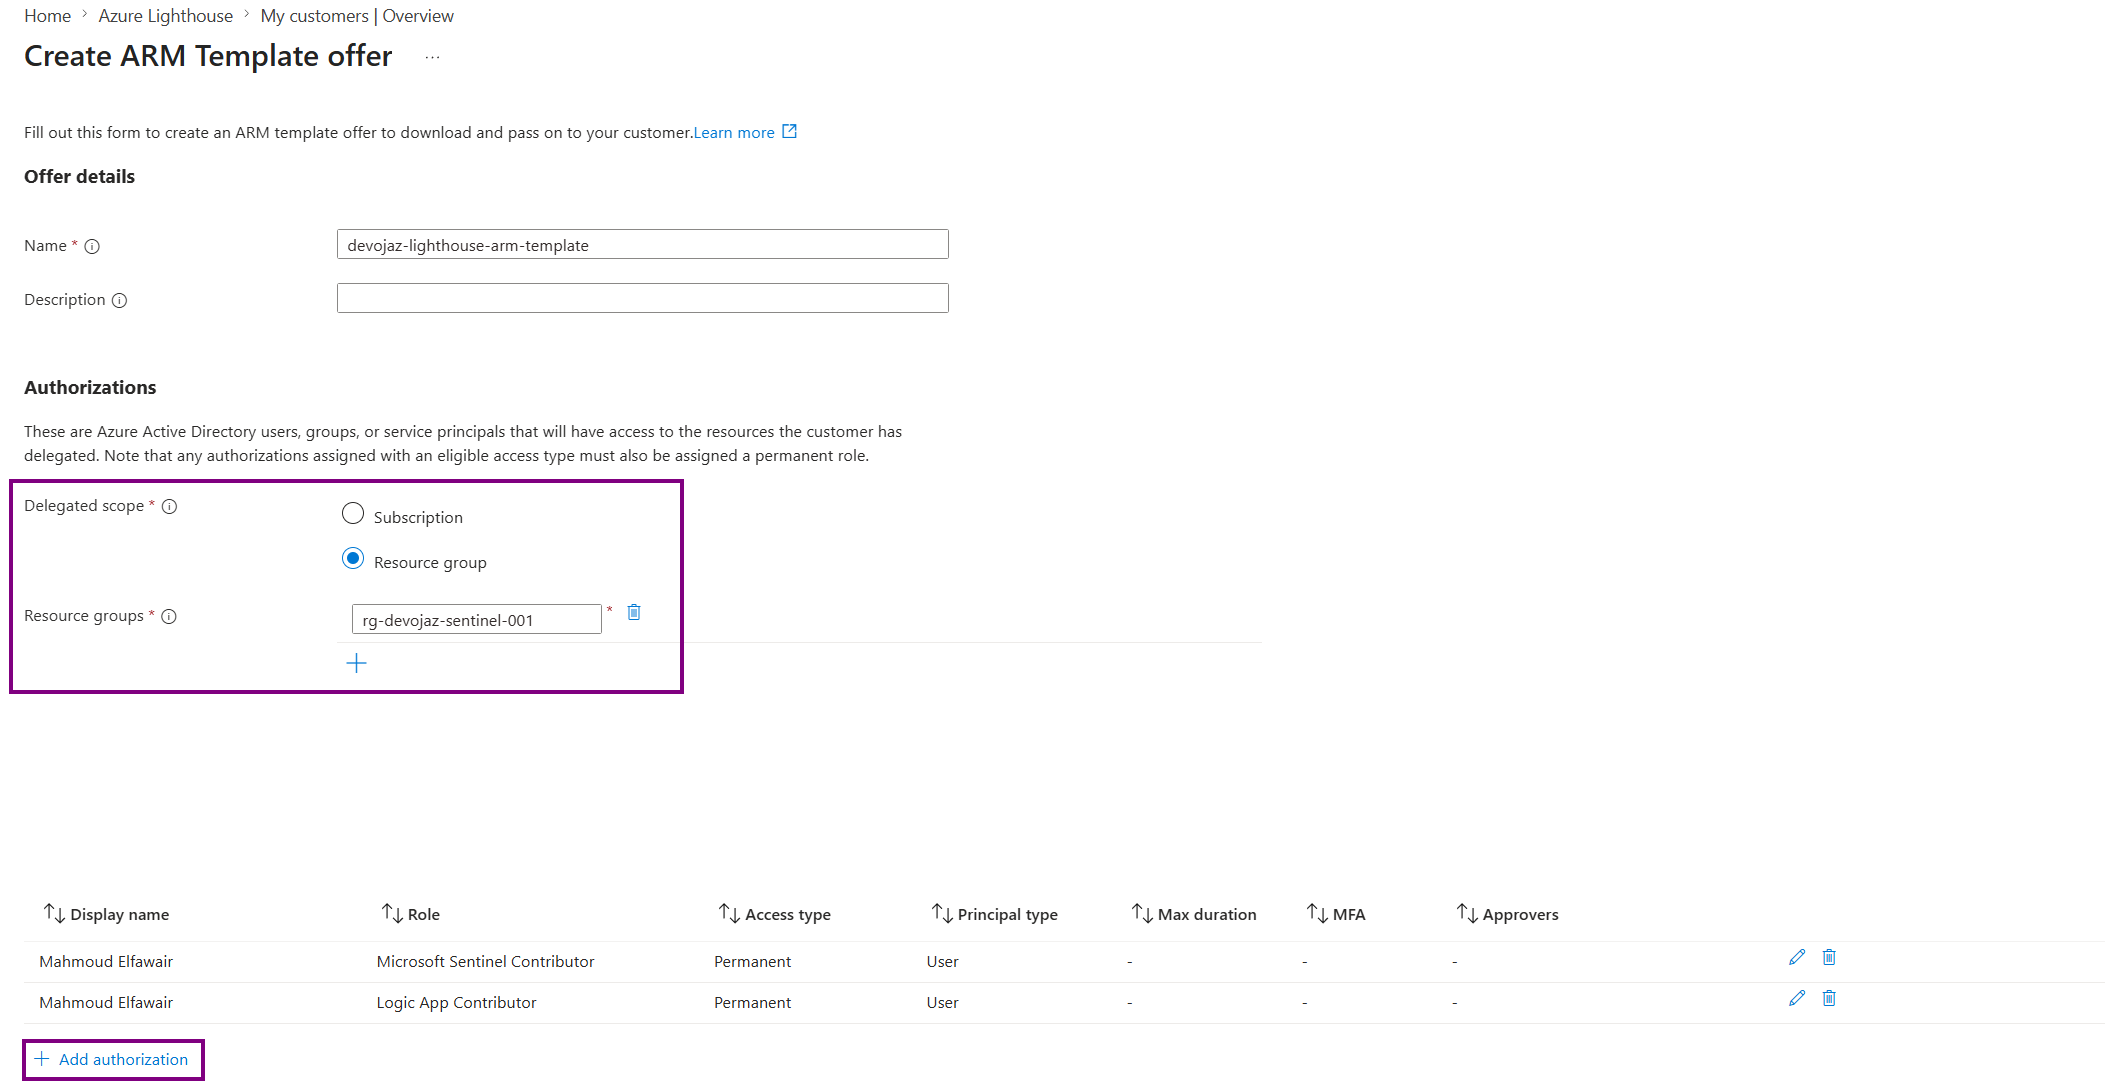 You can either delegate resources to the whole subscription or a specific resource group or even multiple ones
Note that the resource group here is the resource group for the customer that you want to delegate access to.
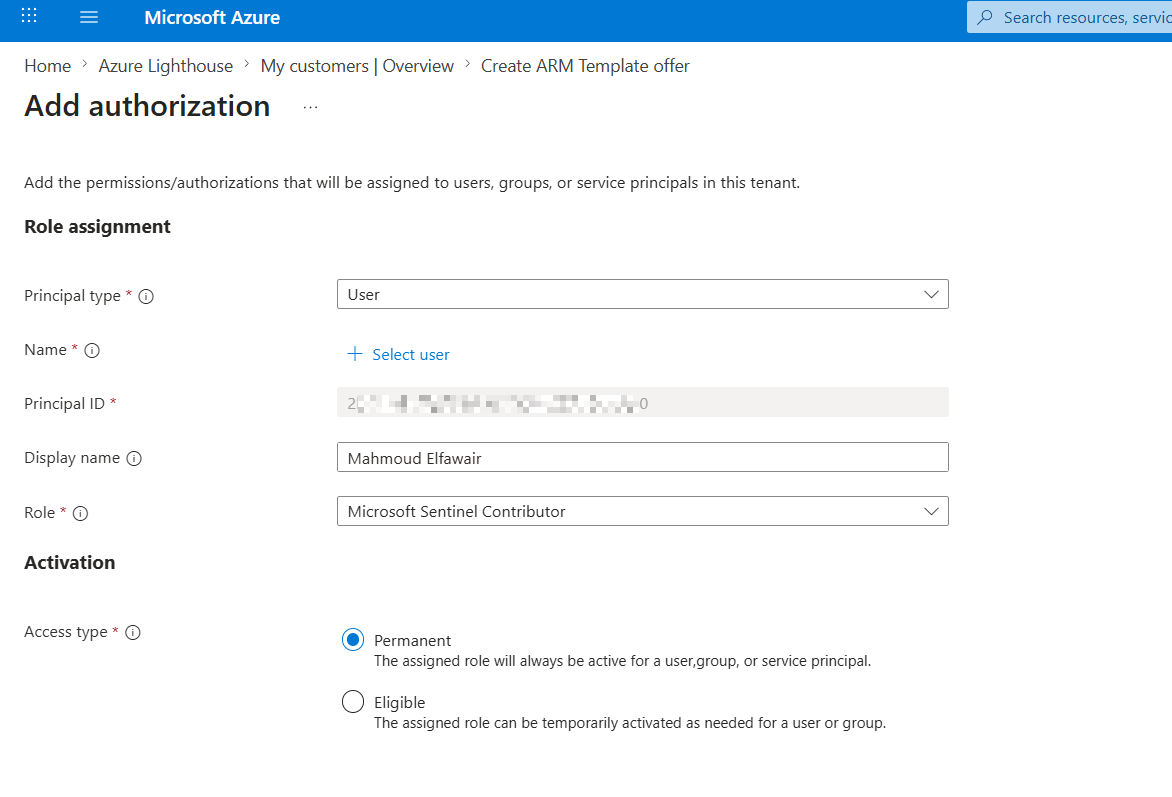
For the authorization, I’ll keep it simple and assign myself as the Microsoft Sentinel Contributor & Logic App Contributor. However, in a real case scenario, you’d have something like this:
- Security Group for L1 Analysts
- Security Group for L2 Analysts
- Security Group for SIEM Admins
And many more…
Each group has its own RBAC roles. For example the L1 group you might want to assign them the following:
For people who only need to audit stuff and check the logs you can only assign them:
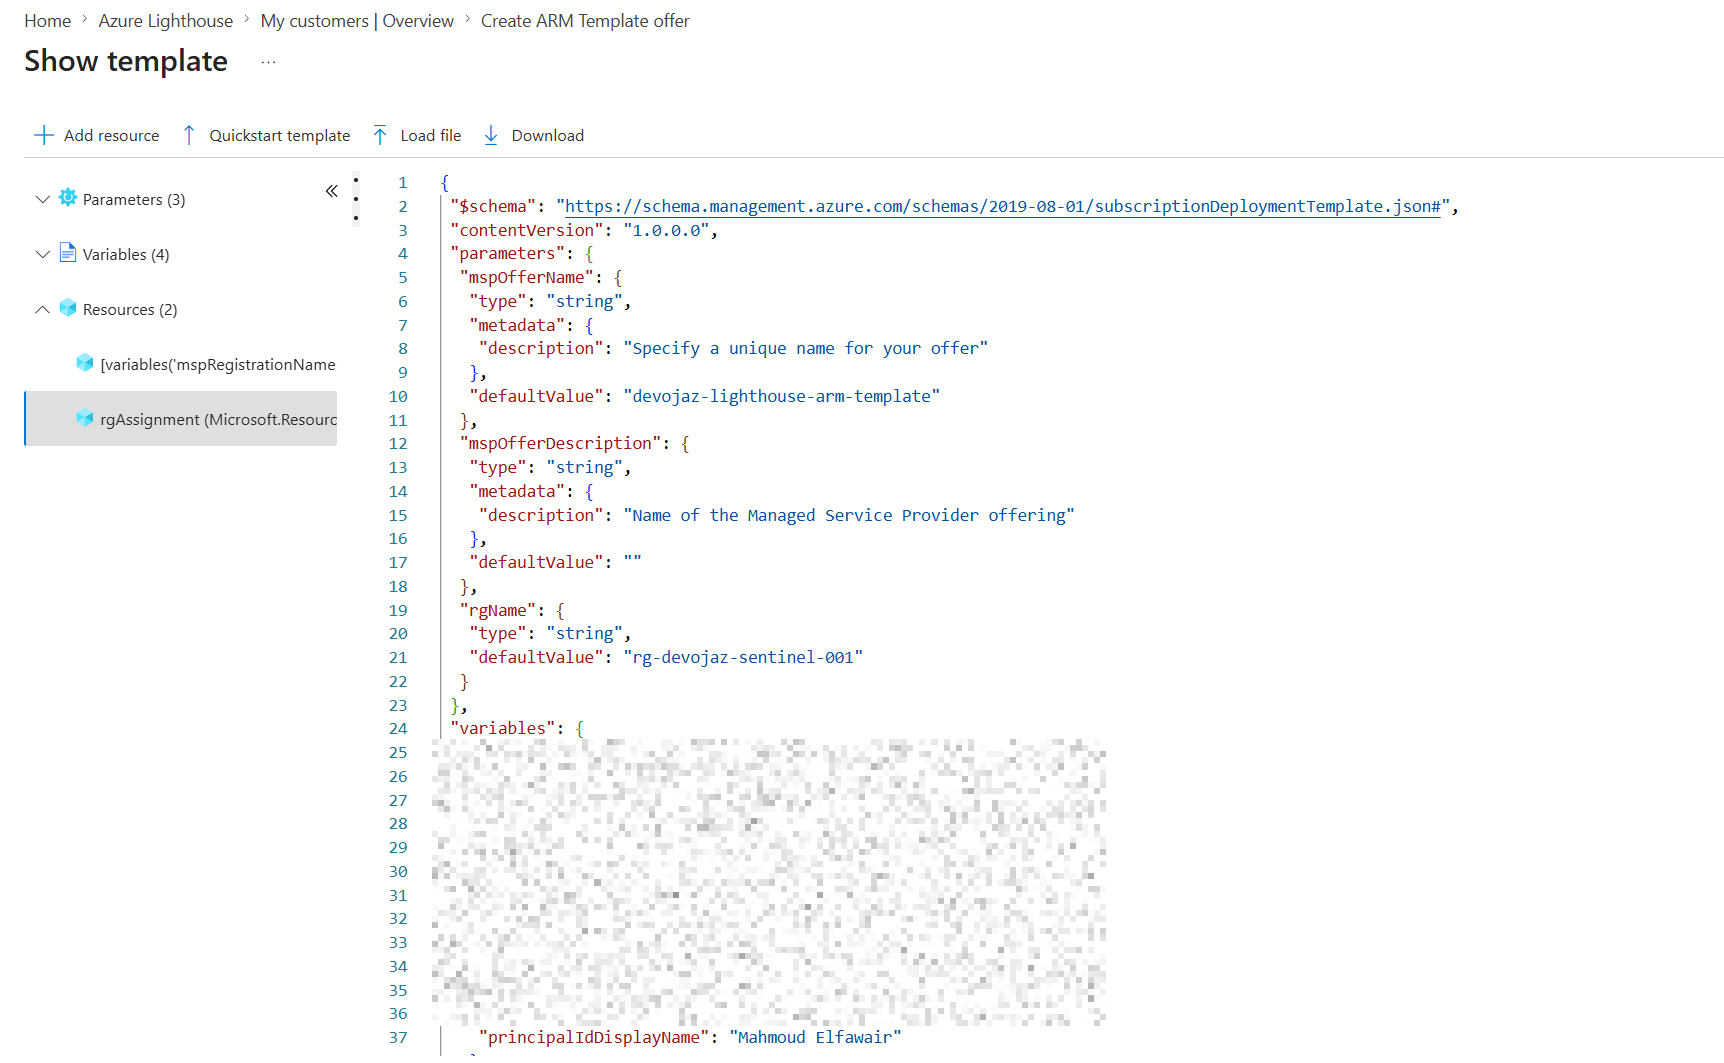
Long story short, once done, click on view template:

It will show you the ARM template, where you can download it because we need to deploy it for the customer.
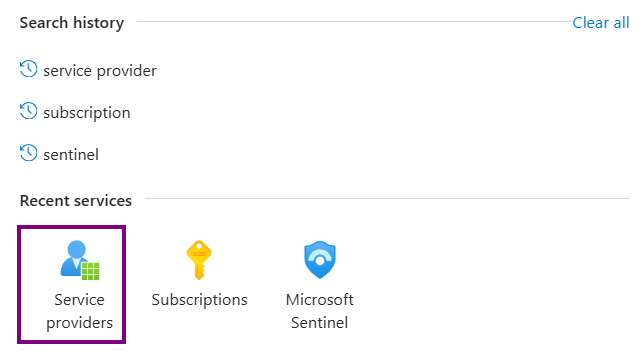
Going back to the Customer’s Azure Portal > Look for Service Providers
An Owner role here is needed ¯\(ツ)/¯
Then under the Service provider offers you can add a new offer
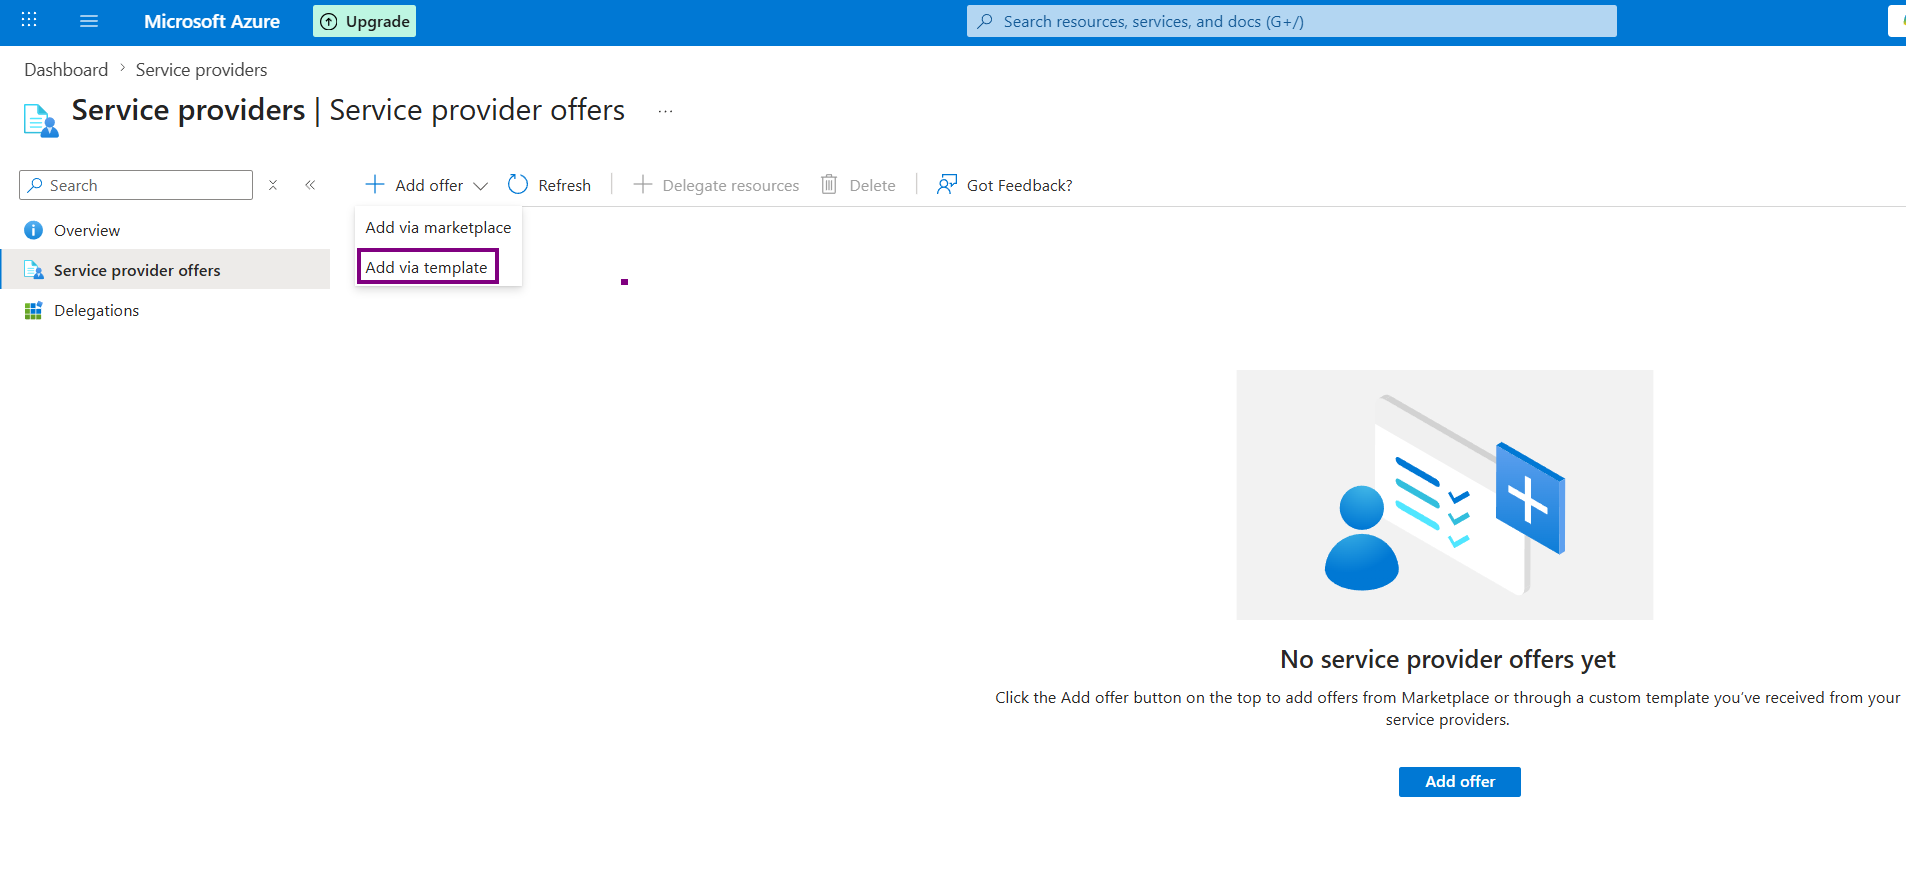
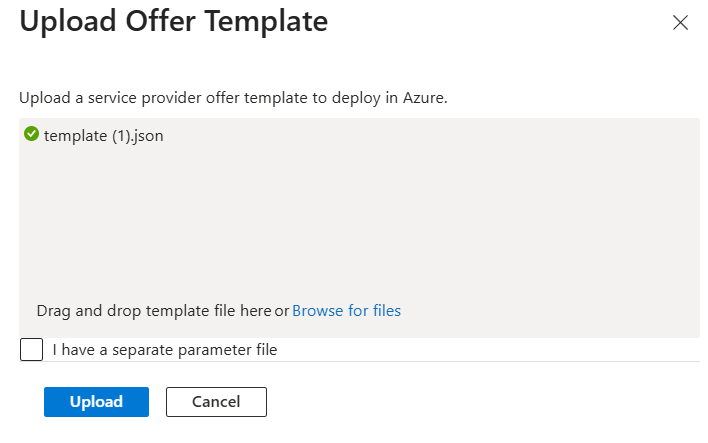
We’ll choose to add it via template
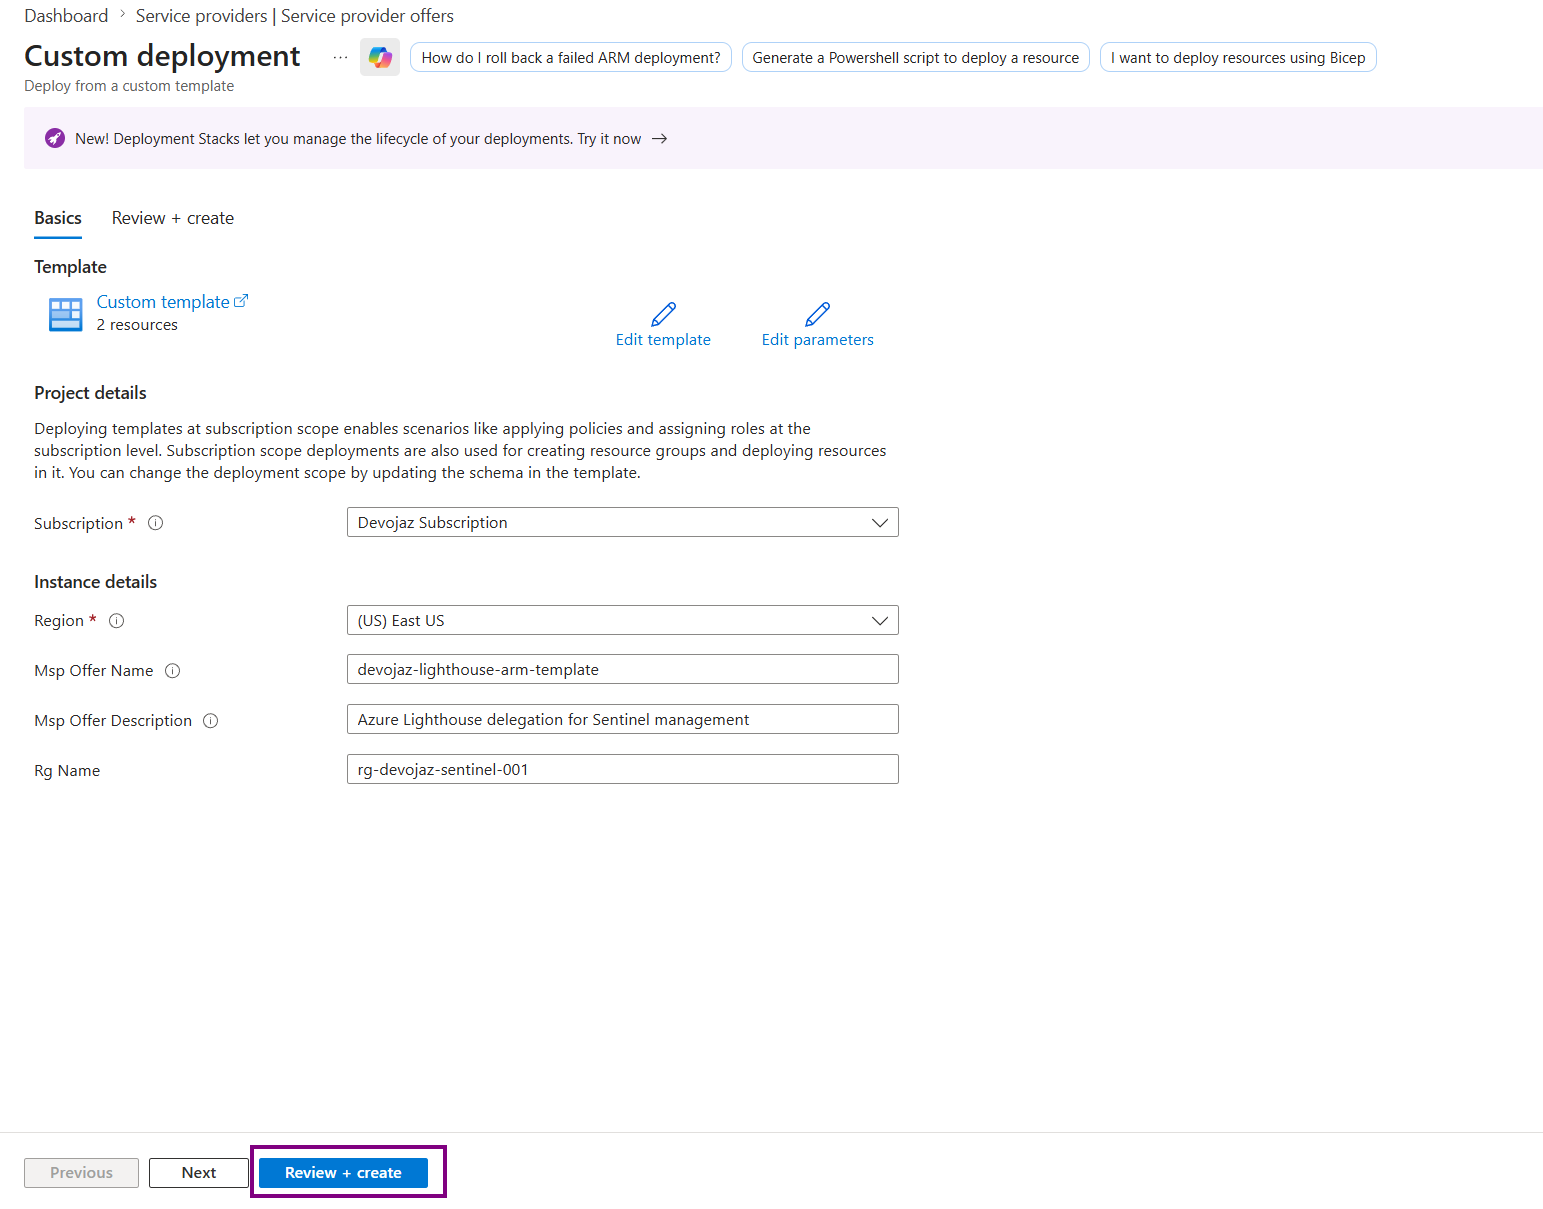
We’ll be redirected to the Custom Deployment page, and you just need to Review + Create. Be aware that it takes some time to deploy.
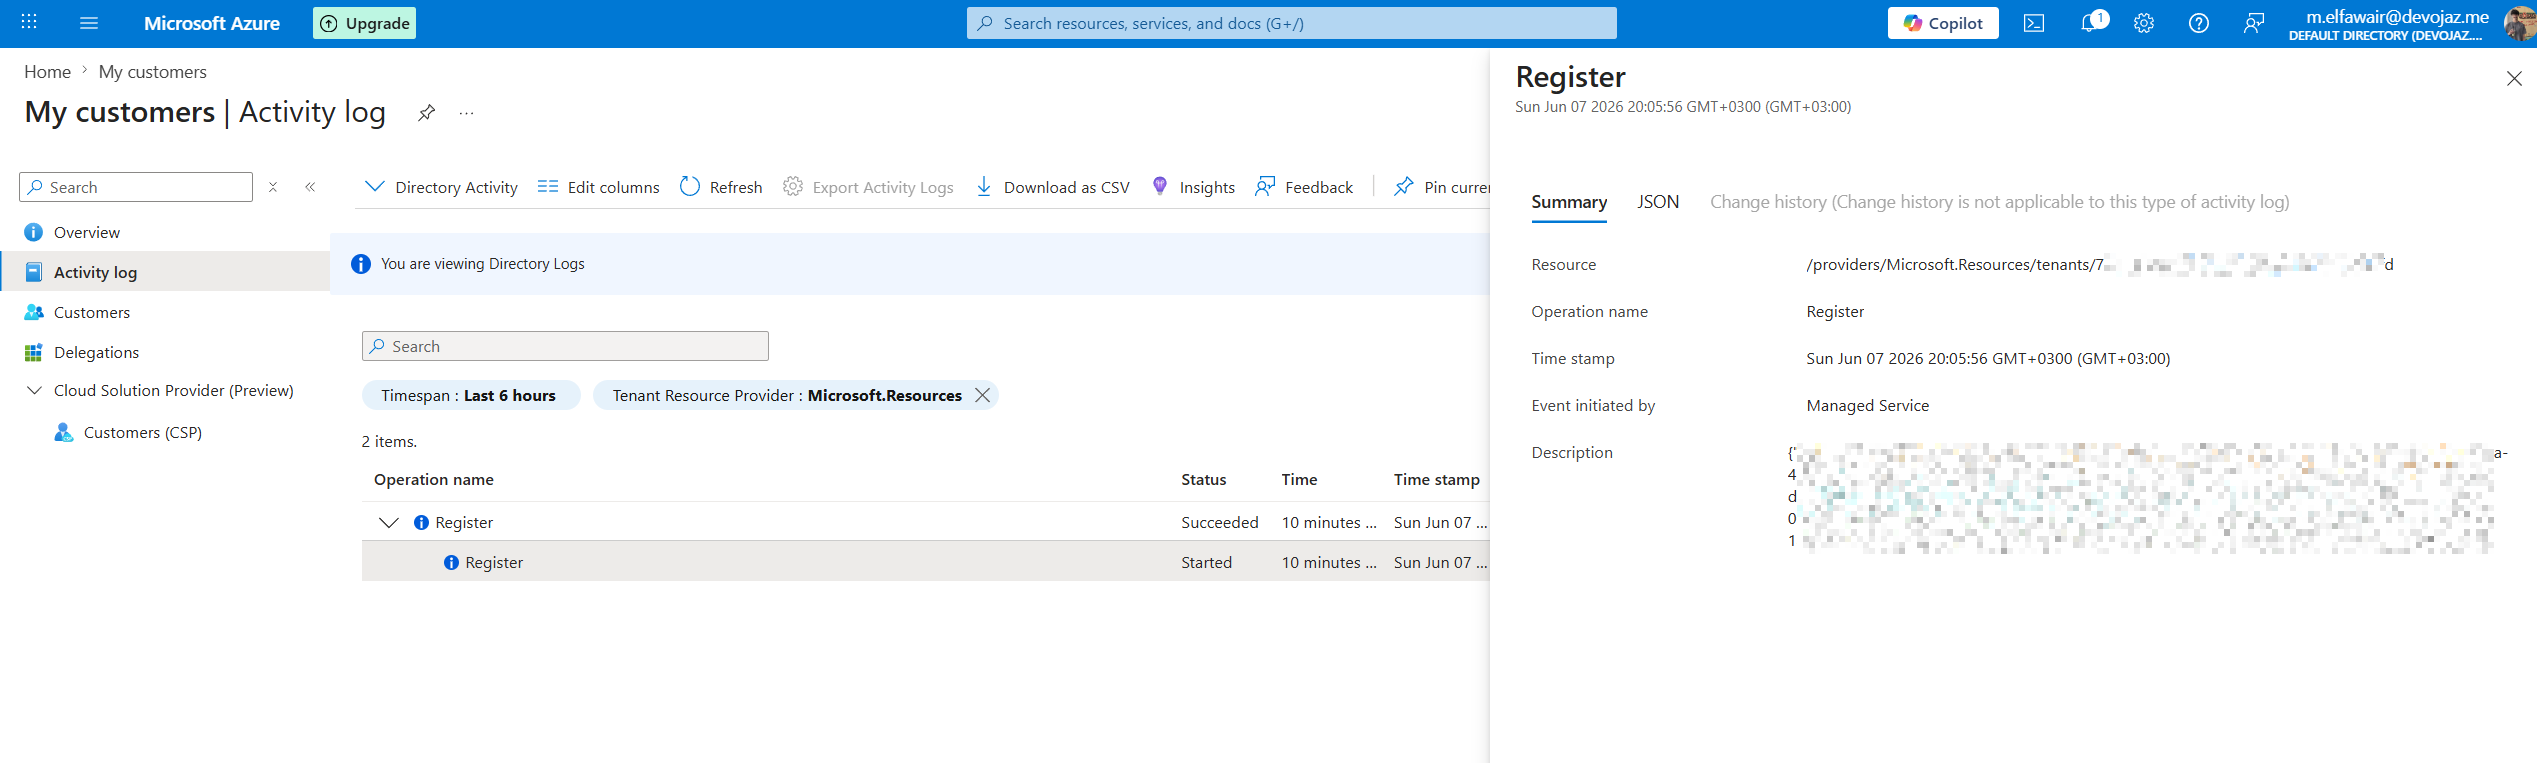
Once done, the activity logs on the MSSP My Customers page will show you the register log, detailing the subscription name and ID.
And for the customer, they will see the service provider offers they have including the one we just created, and to which resource it is created.


Now once we view Microsoft Sentinel, on the MSSP side you’ll notice that you can view the onboarded resource.
Finally mission accomplished.

Protecting Your Intellectual Property#
Now that the customer is onboarded, here’s why this architecture protects your IP.
Some MSSPs build their services around Microsoft Sentinel and require a way to protect the intellectual property (IP) they develop, such as:
- Analytics Rules
- Workbooks
So, I was looking for a way to achieve this and I found this great article by Javier Soriano, where he explains how we can do it, so go and give it a look for more details.
Now I’ll summarize the idea and go through the implementation step by step.
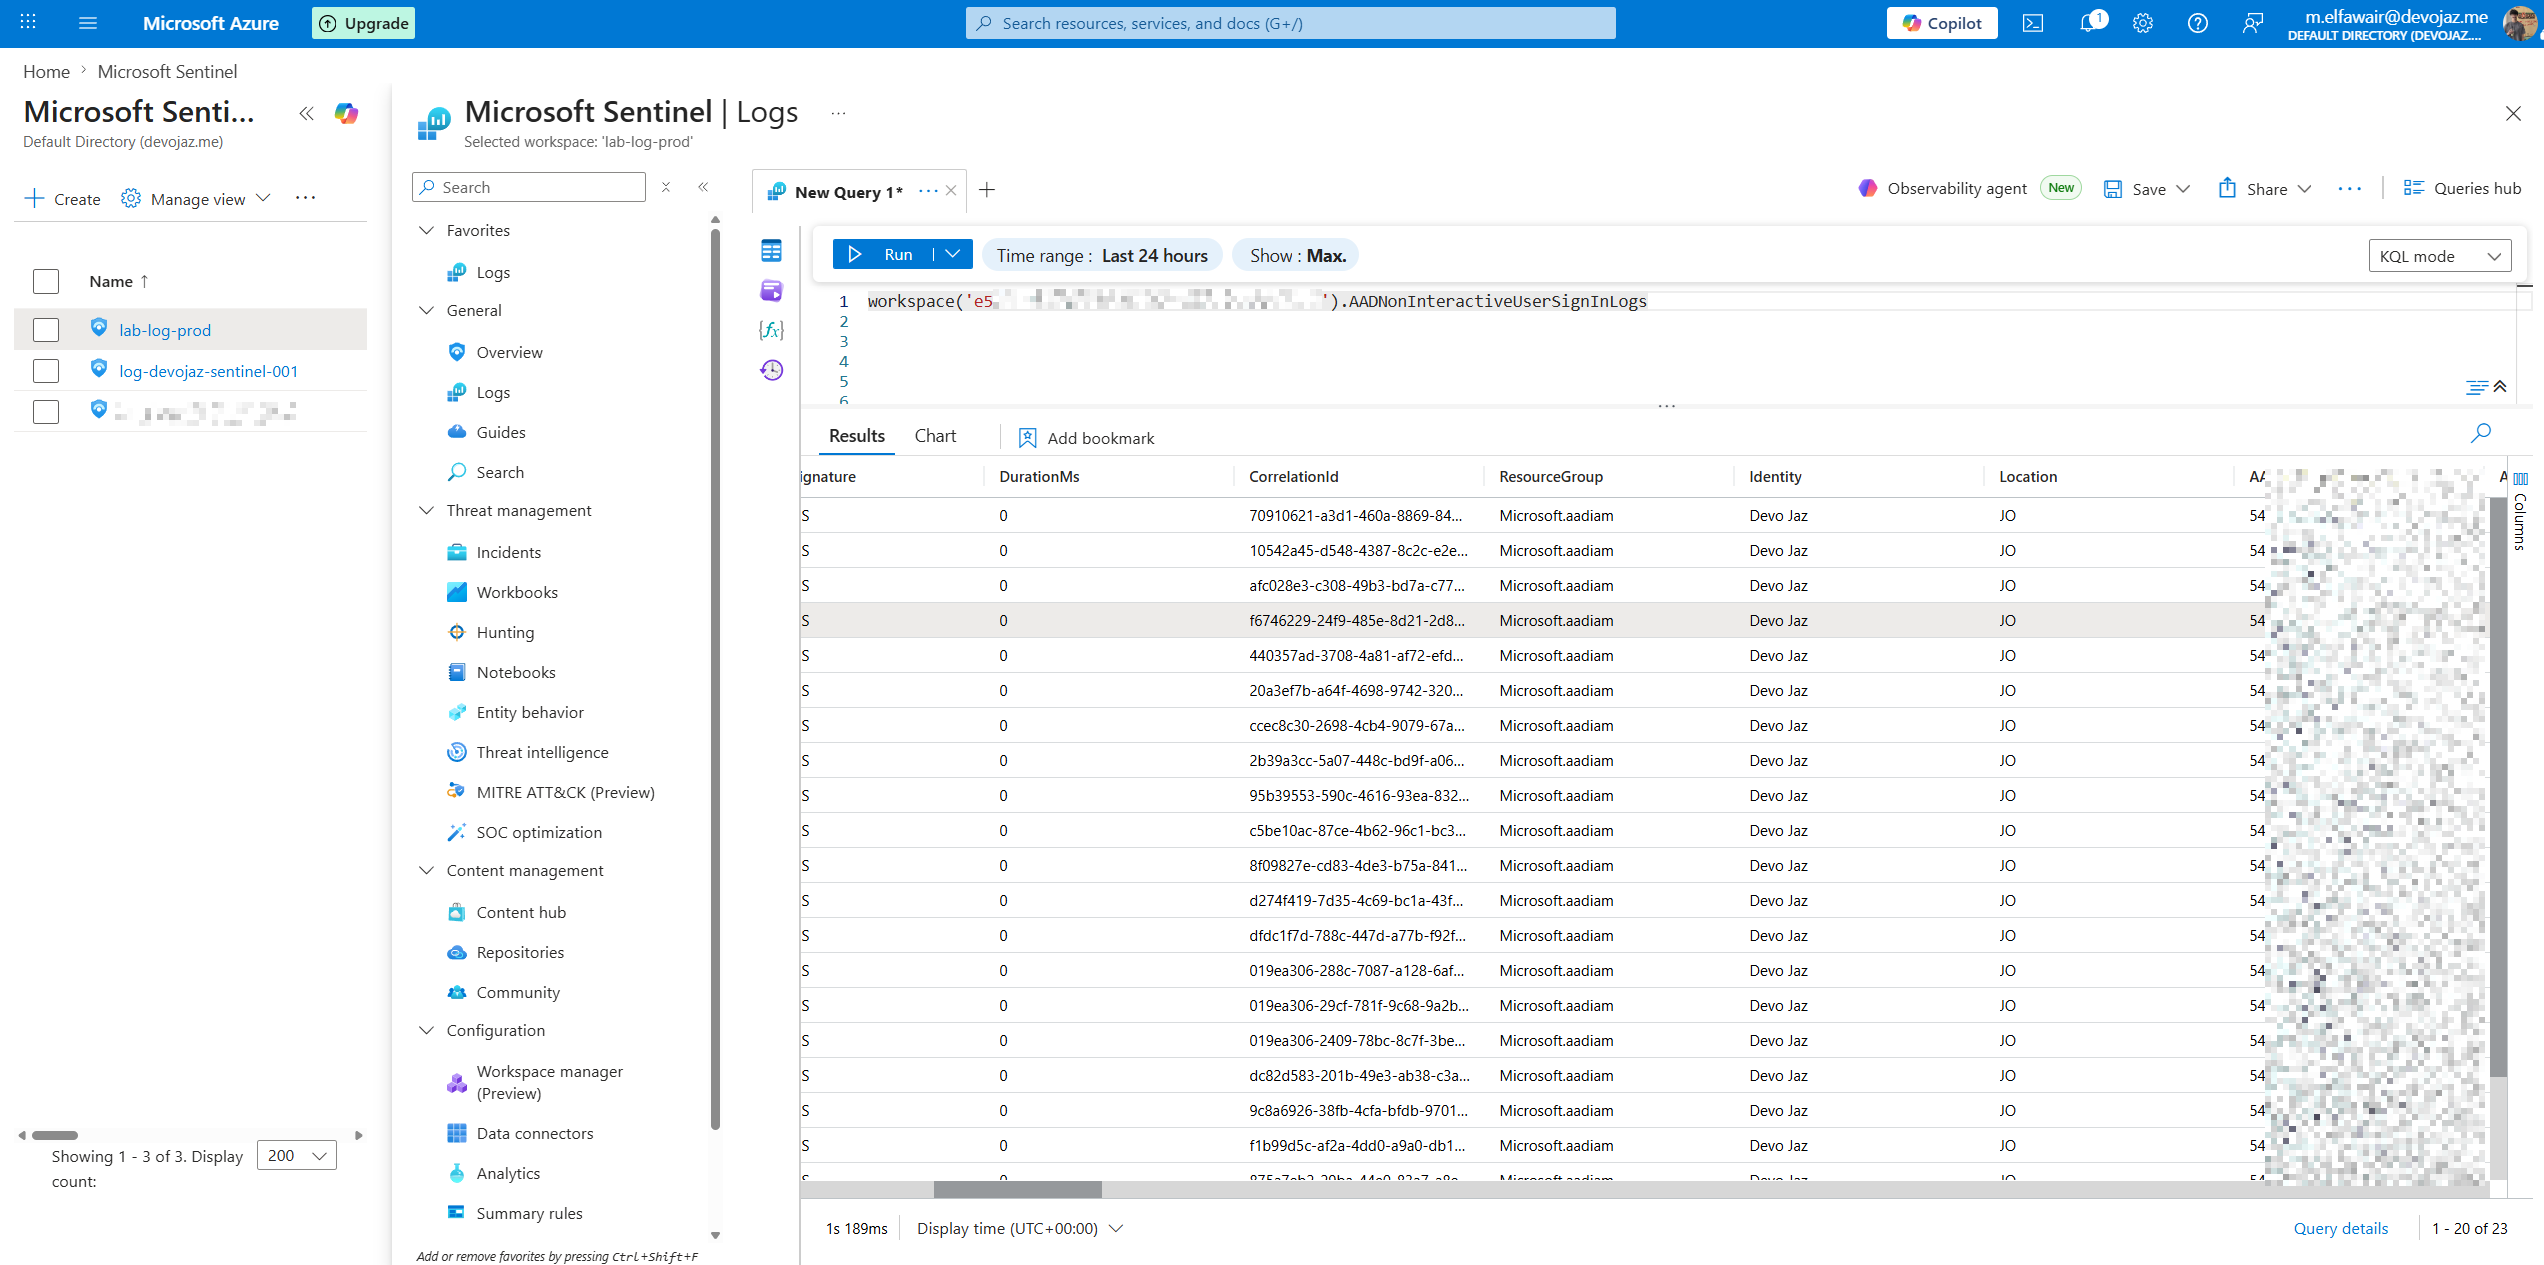
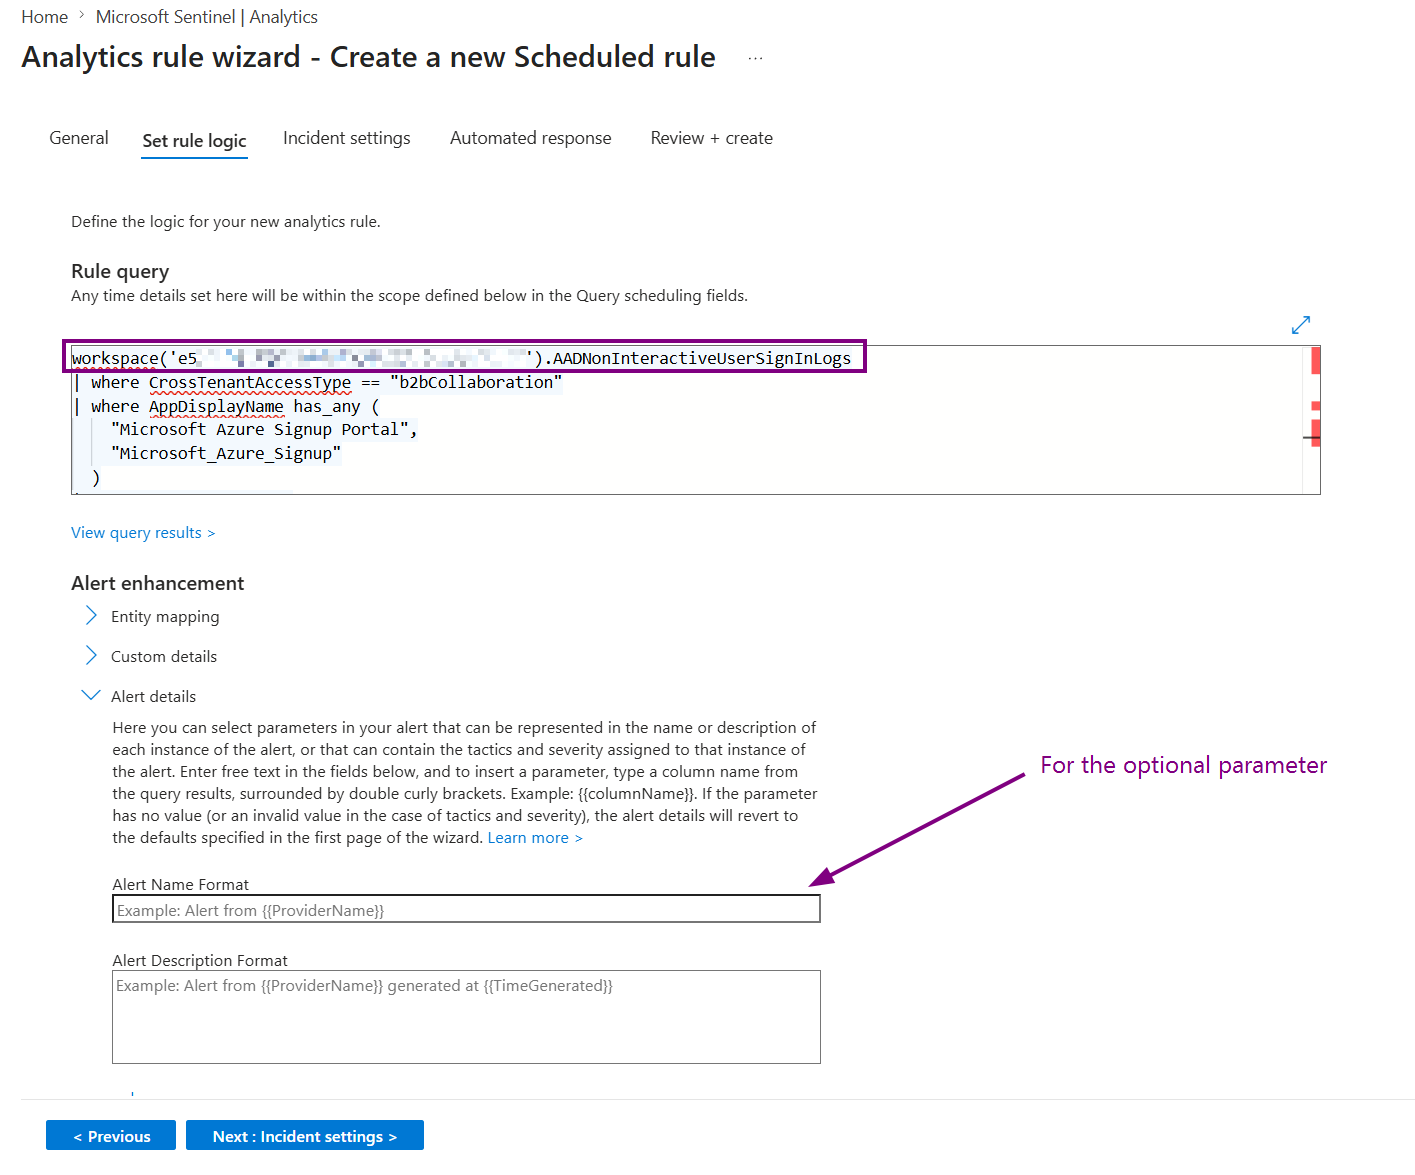
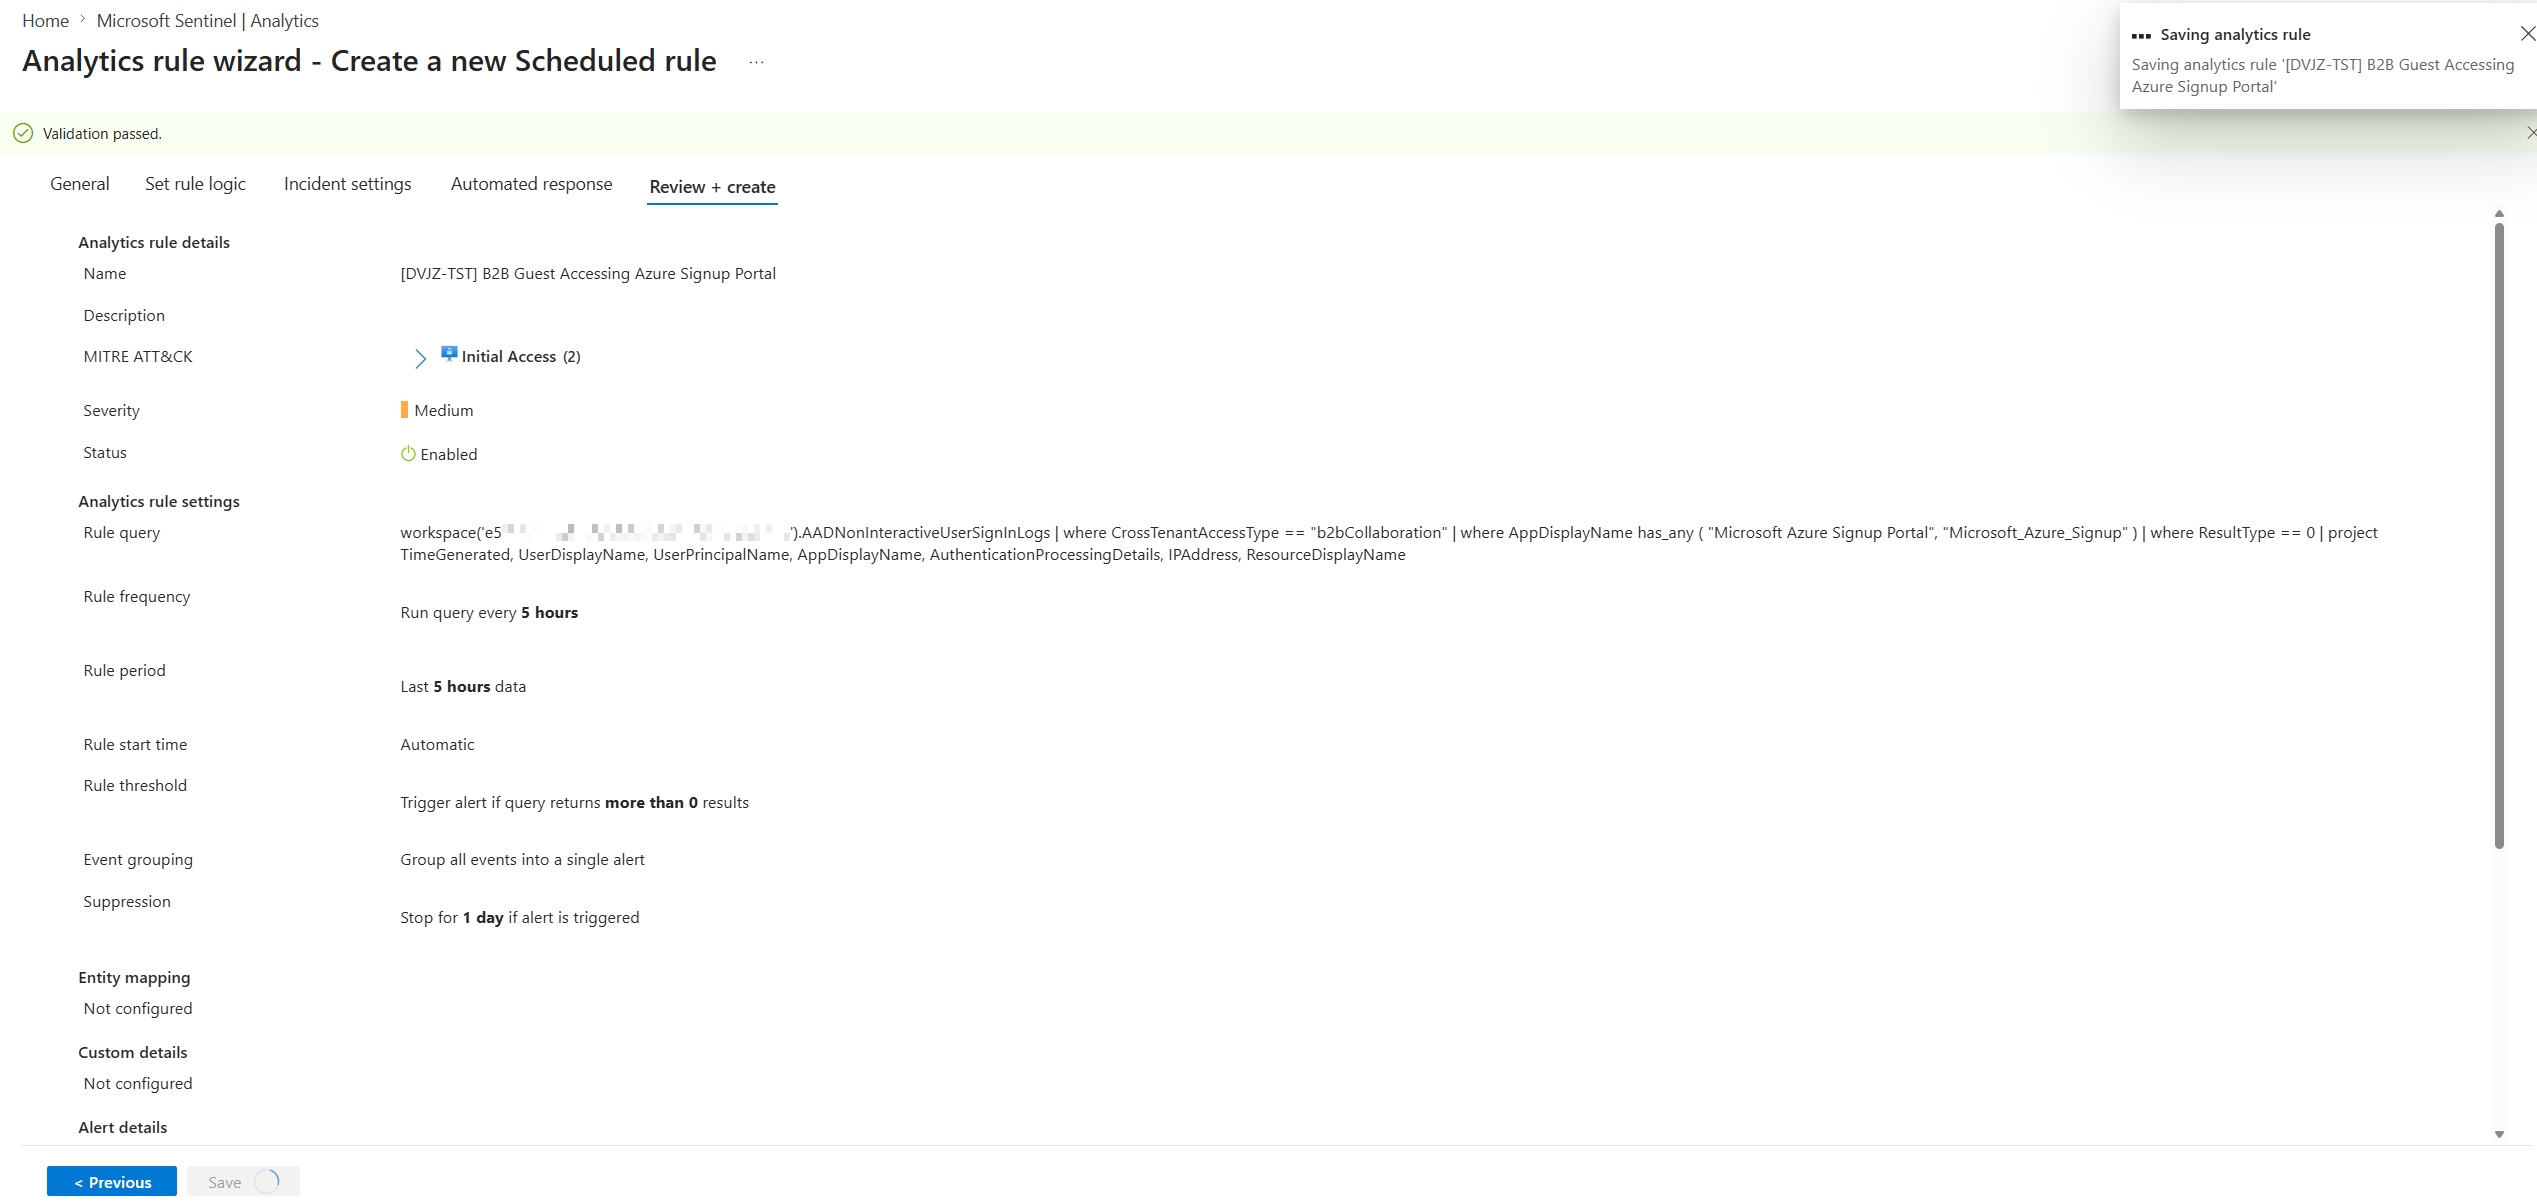
So, if we go to our own Microsoft Sentinel, and use the following KQL Query, which specifies the workspace that it will run on:
workspace('<Customer Workspace ID').<Table Name>
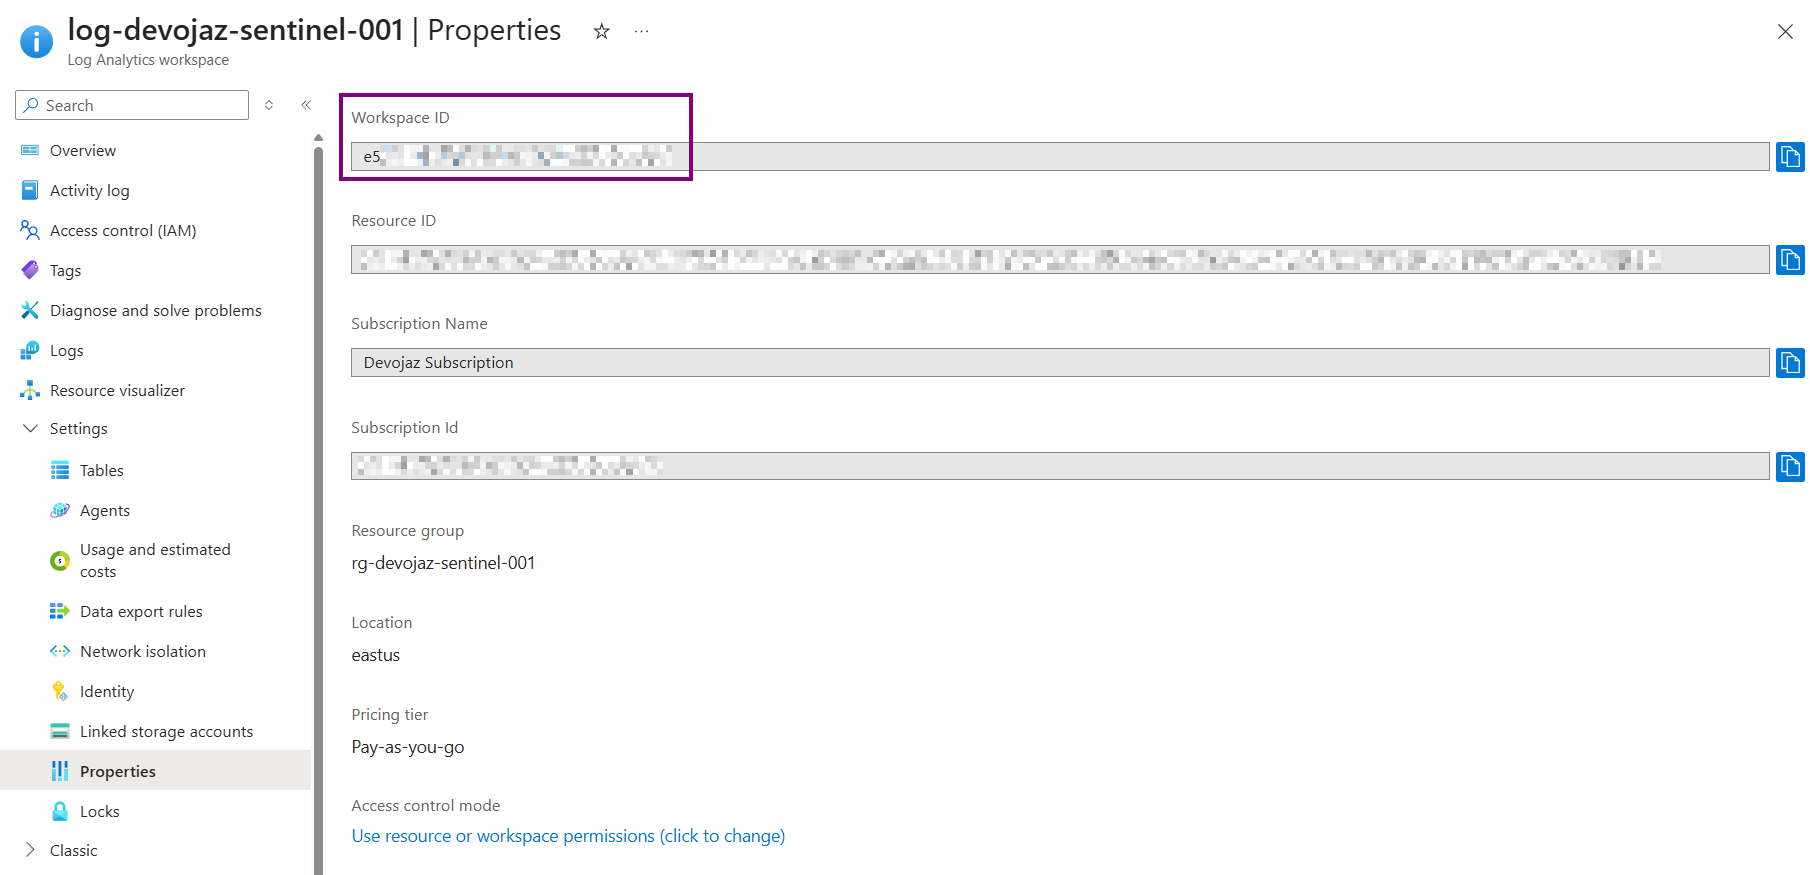
BTW, you can get the customer workspace ID by going to their Log Analytics resource, under settings > Properties:
You’ll notice that we get logs from the customer’s workspace, which means we can write analytical rules & workbooks from our own Microsoft Sentinel that can be executed on the customer’s log.
Note that you have a limit for the number of analytical rules for your Microsoft Sentinel workspace which is
512analytical rules.
Taking the 512 rules limit into consideration, you can create multiple sentinel workspaces, one for each customer, which won’t incur any charges since no logs are being collected there.
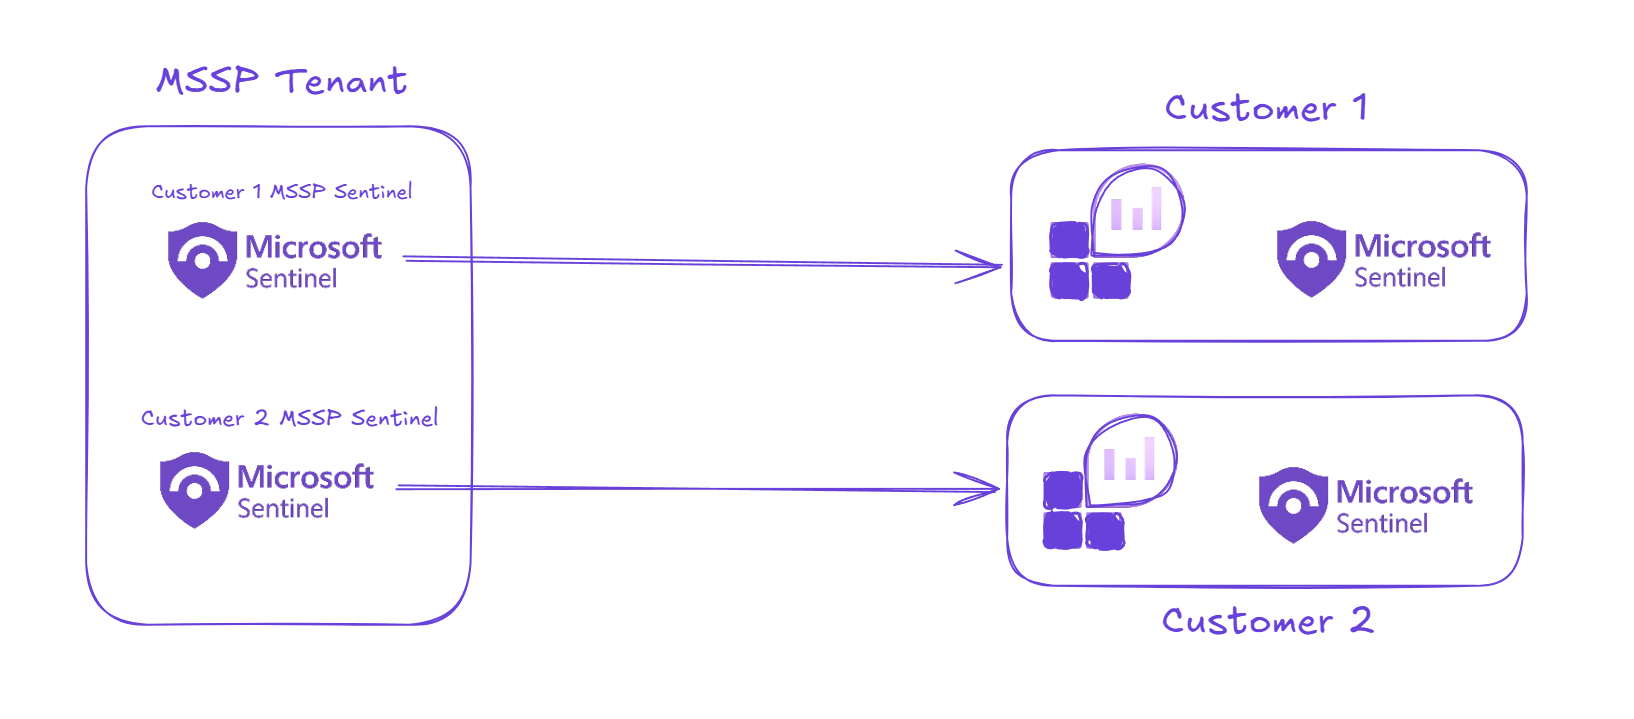
Since the analytics rules and workbooks live in your MSSP Sentinel workspace, customers delegated via Lighthouse have no visibility into your workspace, they can only see alerts and incidents generated in theirs.
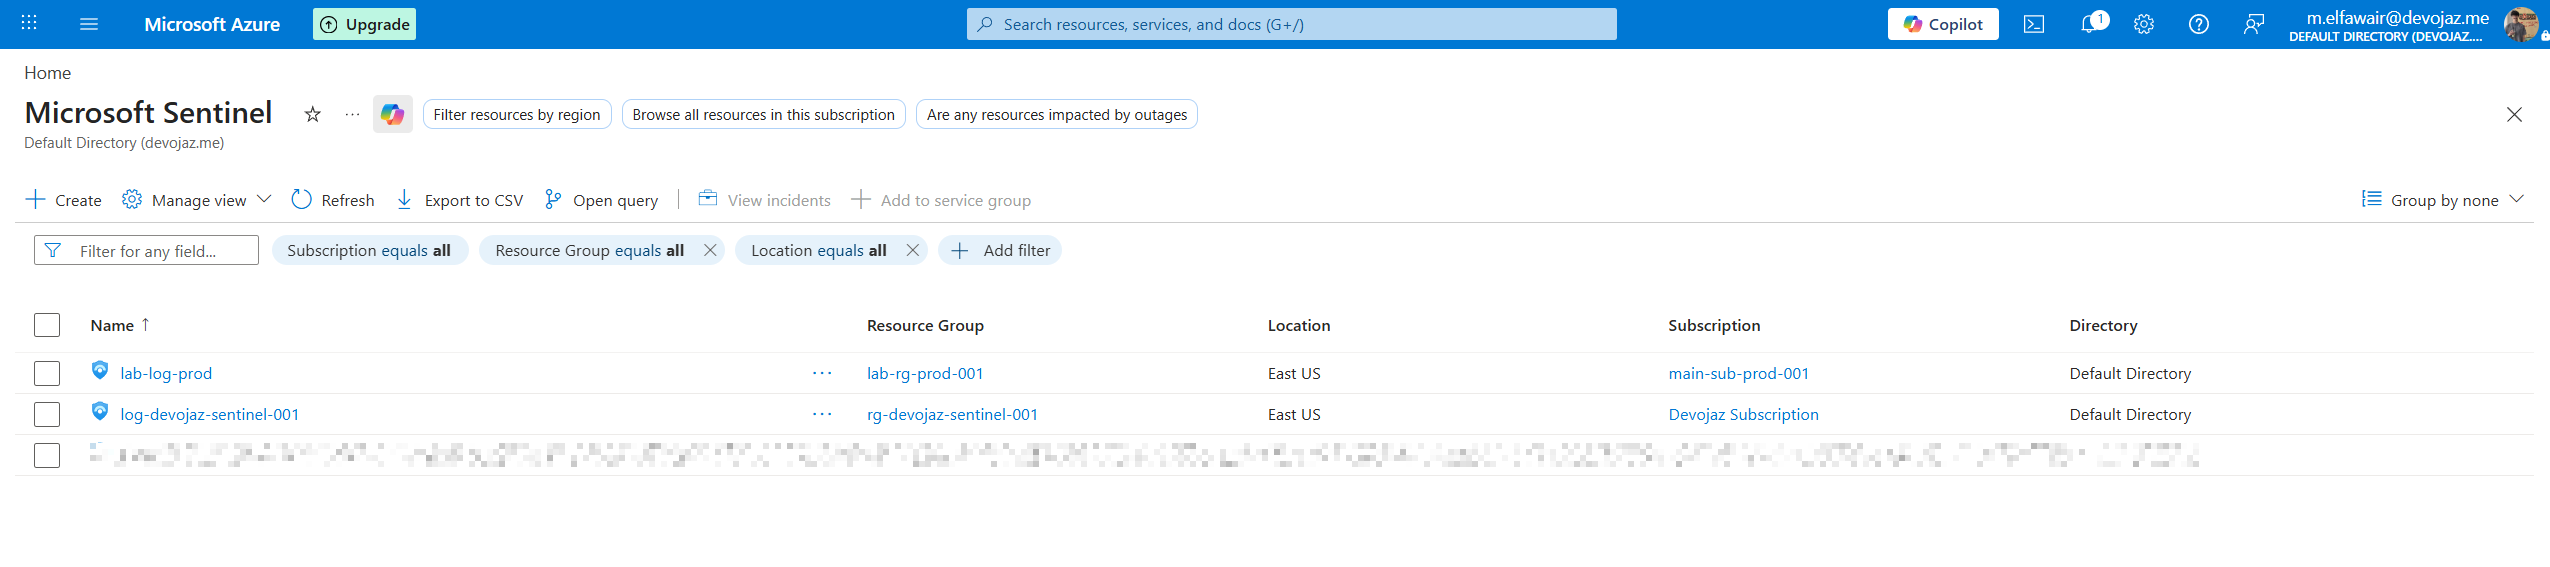
For our case, we have log-devojaz-sentinel-001 as the customer’s workspace and lab-log-prod as the MSSP workspace.
I wrote a rule for testing, just to get an alert back:
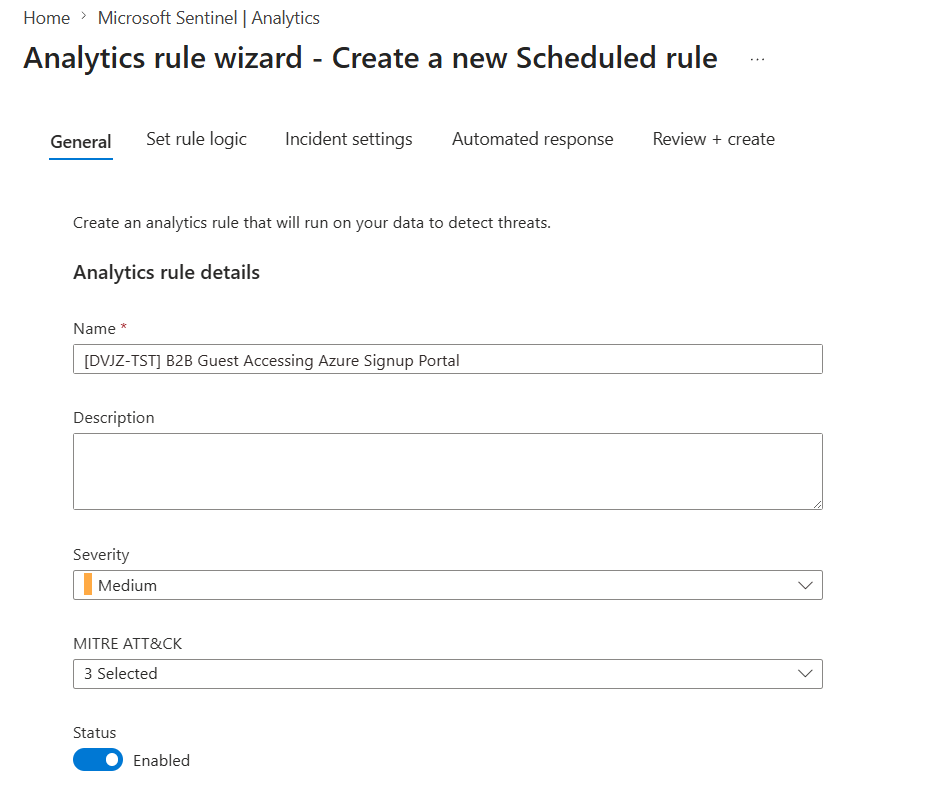 For the rule name here, I usually follow a standard to make things organized and identify customers from each other, like the following:
[CUSTCODE-ENV] RULE NAME (OPTIONAL PARAMETER IF NEEDED)
Saving the analytical rule.
Finally, it got triggered:
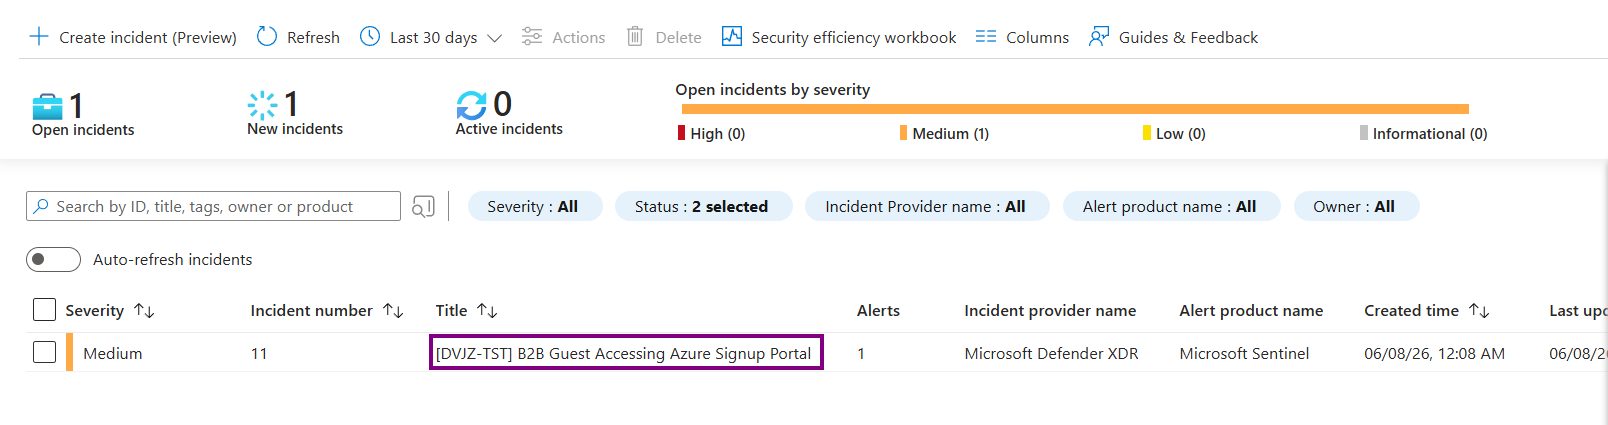
As you can see, that’s how it’s done :)
The Same, goes for Workbooks, since you use the workspace operator. However, there are other ways to do it in workbooks using a combination of Azure Resource Graph Query & Workspace Filter Parameter you create based on the result of Azure Resource Graph Query.
Resources#
https://learn.microsoft.com/en-us/azure/sentinel/mssp-protect-intellectual-property https://techcommunity.microsoft.com/blog/microsoftsentinelblog/what%e2%80%99s-new-cross-workspace-analytics-rules/1664211 https://techcommunity.microsoft.com/blog/microsoftsentinelblog/protecting-mssp%E2%80%99s-intellectual-property-in-microsoft-sentinel/1420941
Ciao#
Thanks for reading, I hope you learned something new :)